How to Maintain Fiber Cement Siding: Complete Clark County Homeowner's Guide
Everything you need to know to keep your James Hardie siding looking great and lasting decades in the Pacific Northwest climate.
Jump to Section
Navigate directly to the information you need
Why Fiber Cement Siding Maintenance Matters for Pacific Northwest Homes
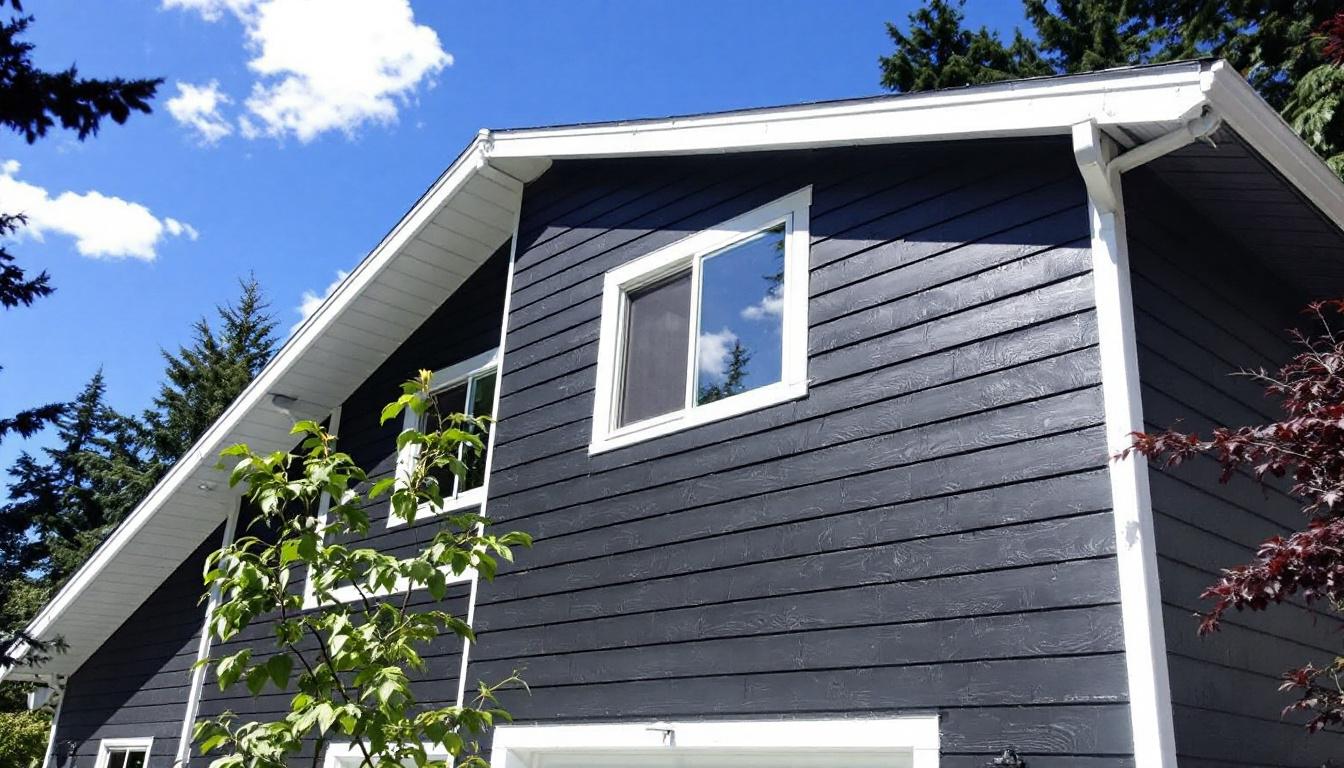
 Fiber cement siding, particularly James Hardie products, is one of the most durable exterior cladding options available. It resists rot, fire, insects, and impact far better than vinyl or wood. But even the toughest siding material needs regular care to reach its full 50-year lifespan, and that's especially true in Clark County's demanding Pacific Northwest climate. Our region receives over 40 inches of rain annually, and the combination of persistent moisture, mild temperatures, and shade from mature trees creates ideal conditions for mold, mildew, and algae growth on exterior surfaces.
When homeowners neglect fiber cement siding maintenance, the consequences compound over time. Dirt and organic growth trap moisture against the siding surface, which accelerates paint deterioration. Failed paint exposes the raw cement board to water absorption, and once moisture penetrates the board, freeze-thaw cycles in winter can cause cracking and delamination. Caulk joints deteriorate and allow water behind the siding, leading to sheathing rot and potential structural damage. We've seen homes where a few years of neglect turned into $10,000+ in siding damage repair costs that simple annual maintenance would have prevented entirely.
Warranty Warning
James Hardie's product warranty requires homeowners to perform reasonable maintenance. Damage caused by neglect, including moisture intrusion from failed caulking, mold growth from lack of cleaning, or paint failure from deferred repainting, is explicitly excluded from warranty coverage. Keeping up with basic maintenance protects both your siding and your warranty.
The good news is that fiber cement maintenance is straightforward and far less demanding than wood siding. A few hours of attention each year keeps your siding performing and looking its best for decades. This guide walks you through exactly what to do, when to do it, and when to call a professional. For a broader overview of fiber cement as a material, see our vinyl vs fiber cement siding comparison or our in-depth James Hardie cost and value analysis.
Annual Cleaning Schedule: How to Wash Fiber Cement Siding Properly
Annual cleaning is the single most important maintenance task for fiber cement siding. In the Pacific Northwest, the best time to clean your James Hardie siding is late spring, typically May or early June. This timing lets you remove the winter's accumulation of dirt, moss, and mildew before summer, and it gives the siding a fresh start during the drier months. Homes with heavy shade or north-facing walls may benefit from a second cleaning in early fall.
What You'll Need
Tools
- Garden hose with adjustable nozzle
- Soft-bristle brush (car wash brush works well)
- Extension pole for reaching upper stories
- Bucket for cleaning solution
Cleaning Solutions
- General cleaning: Mild dish soap + warm water
- Mildew/algae: 1 part white vinegar to 3 parts water
- Stubborn stains: Oxygen bleach (OxiClean) solution
- Avoid: Chlorine bleach, abrasive cleaners, steel wool
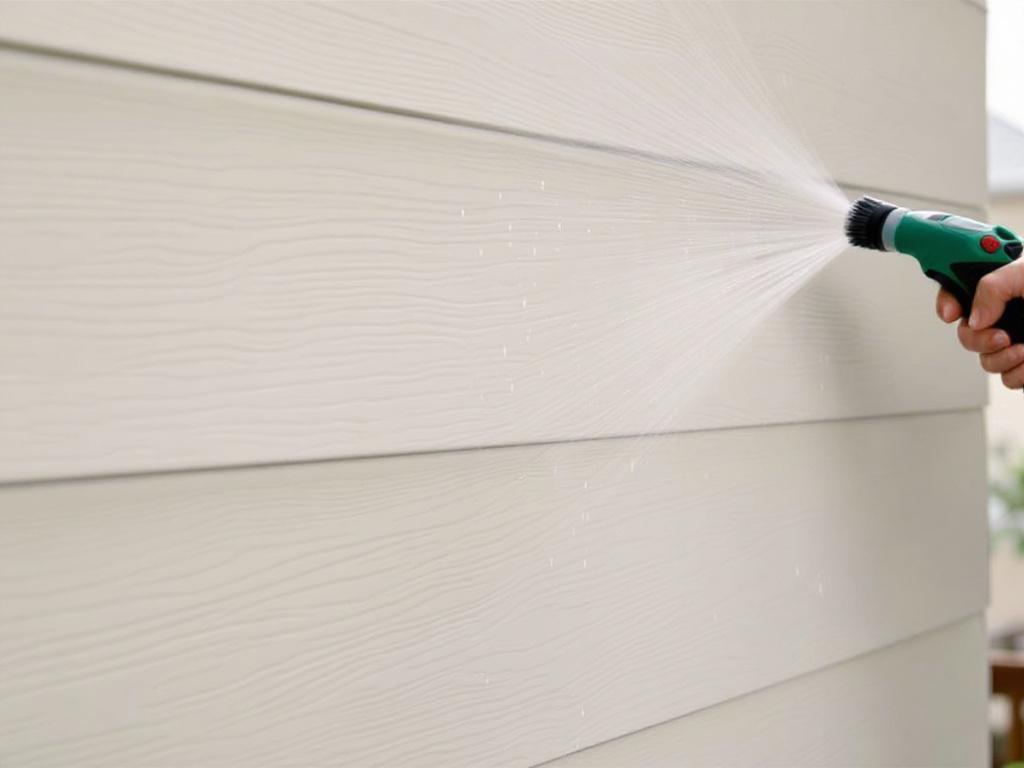
Step-by-Step Cleaning Process
Pre-rinse the siding
Use your garden hose to wet the entire wall from bottom to top. This loosens surface dirt and prevents cleaning solution from drying on the siding before you can scrub it. Work in manageable sections, typically one wall at a time.
Apply cleaning solution
Dip your soft-bristle brush into the cleaning solution and apply to the siding, working from the bottom up to avoid streak marks. For mildew-heavy areas, let the vinegar solution sit for 5-10 minutes before scrubbing. Use gentle, circular motions and avoid aggressive scrubbing that could damage the paint finish.
Rinse thoroughly
Rinse the section from top to bottom with clean water, making sure all soap residue is removed. Soap left on the surface attracts dirt and can leave visible residue. Move to the next section and repeat.
Inspect while cleaning
Use the cleaning process as an opportunity to inspect your siding up close. Look for cracked or chipped boards, gaps in caulking, paint that's peeling or chalking, and any signs of moisture damage. Note any issues so you can address them after cleaning.
Low-Pressure Washing Only
If you prefer using a pressure washer instead of a hose and brush, keep the PSI below 1,500 and use a wide-angle tip (25-degree or 40-degree). Hold the wand at least 12 inches from the siding and never spray upward under the lap joints, as this forces water behind the boards. High-pressure washing (over 2,000 PSI) can damage the factory finish, gouge the cement board, and void your warranty. For professional-grade results without the risk, consider our siding cleaning services.
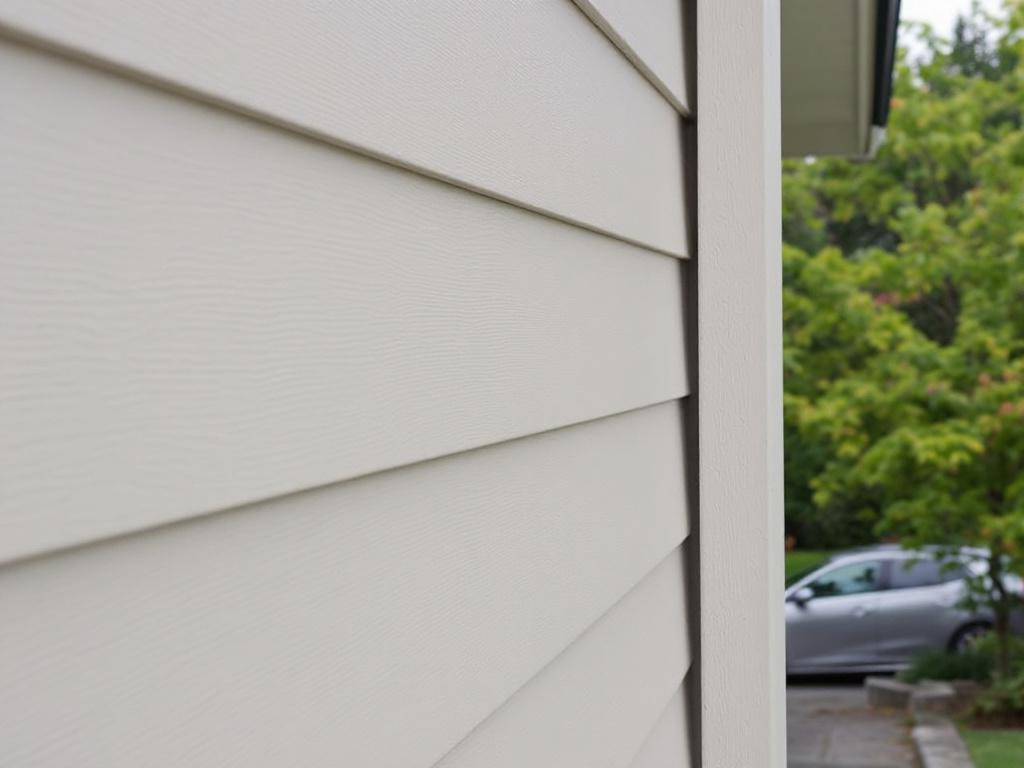
Inspecting and Repairing Caulking Around Your Fiber Cement Siding
 Caulking is the unsung hero of your siding system. It seals the gaps between siding boards and trim pieces where water would otherwise penetrate and cause damage. In the Pacific Northwest's wet climate, failed caulk joints are one of the most common causes of moisture damage behind fiber cement siding. Checking your caulk annually and recaulking as needed is a simple task that prevents expensive siding repairs down the road.
Where to Inspect Caulking
Around window and door trim: These are the highest-risk areas because water naturally runs down from above and collects at horizontal trim pieces. Inspect the top edge of head trim and the sides of window casings carefully.
Corner boards and trim intersections: Vertical corner trim creates long joints that expand and contract with temperature changes. Check for gaps where the siding meets corner boards on every corner of your home.
Butt joints between siding boards: Where two horizontal siding boards meet end-to-end, caulk fills the gap. These joints are especially vulnerable because they're often tight and difficult to seal completely during installation.
Where siding meets other materials: Check anywhere fiber cement siding transitions to brick, stone, stucco, or meets a roofline, chimney, or deck ledger board.
Signs of Failed Caulking
Cracking or splitting: Caulk that has dried out and cracked open, leaving visible gaps where water can enter.
Pulling away from surfaces: Caulk that has separated from the siding or trim, creating a gap on one or both sides of the bead.
Missing entirely: Joints where caulk has deteriorated completely or was never applied during installation. Pay special attention to butt joints.
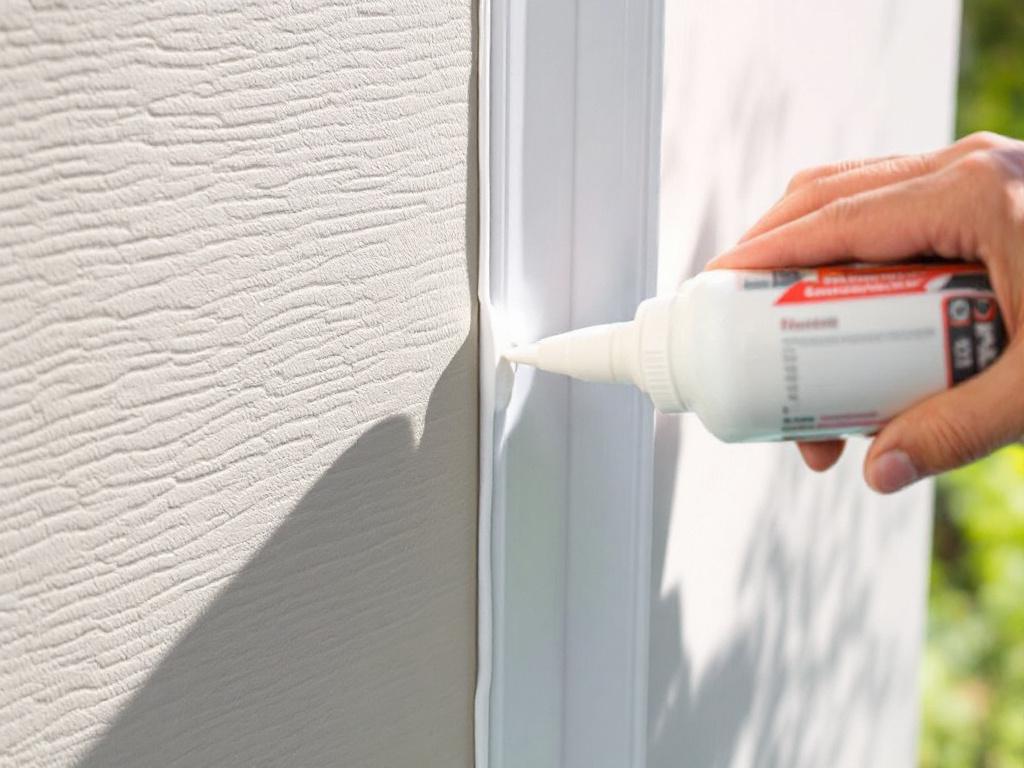
How to Recaulk Properly
Remove old, failed caulk completely using a putty knife or oscillating tool. Clean the joint with a stiff brush to remove debris and dust. Apply painter's tape on both sides of the joint for a clean line. Apply new caulk in a steady bead, then use a wet finger or caulk tool to smooth the bead into the joint, ensuring good contact with both surfaces. Remove the tape immediately before the caulk skins over.
Recommended Caulk Types for Fiber Cement
Use a high-quality, paintable polyurethane or elastomeric sealant. Industry experts recommend products like NP1 by BASF or Quad by OSI for fiber cement applications. These sealants remain flexible after curing, which is critical because fiber cement and trim expand and contract with temperature changes. Avoid 100% silicone caulk. It cannot be painted and does not bond reliably to fiber cement.
When to Repaint James Hardie Siding (And How to Know It's Time)
 When your fiber cement siding needs repainting depends entirely on which product you have installed. Understanding the difference between James Hardie's ColorPlus factory finish and field-applied paint on primed boards is critical for planning your maintenance timeline and budget. If you're unsure which type is on your home, check your original installation documents or look for the ColorPlus logo stamped on the back of a board in your attic or garage where cut-off pieces may have been stored.
ColorPlus Factory Finish
Repaint timeline: 20-25+ years
ColorPlus technology applies multiple coats of paint in a controlled factory environment, then bakes the finish for superior adhesion and UV resistance. This factory-applied finish dramatically outlasts field-applied paint. Most ColorPlus installations in Clark County remain in excellent condition for two decades or more before showing signs of wear.
James Hardie provides a 15-year finish warranty on ColorPlus, but real-world performance typically exceeds that timeframe significantly. Touch-ups on individual damaged boards may be needed sooner, but full repainting is rarely required before year 20.
Primed (Field-Painted) Boards
Repaint timeline: 10-15 years
Primed James Hardie boards arrive with a factory-applied primer coat. Your contractor then applies two coats of exterior paint on-site after installation. This approach gives you unlimited color options but the field-applied paint will not last as long as the ColorPlus baked finish.
In our Vancouver-area climate, field-painted fiber cement typically needs repainting every 10-15 years depending on sun exposure, paint quality, and preparation. South- and west-facing walls degrade fastest due to UV exposure and often need attention before north- and east-facing walls.
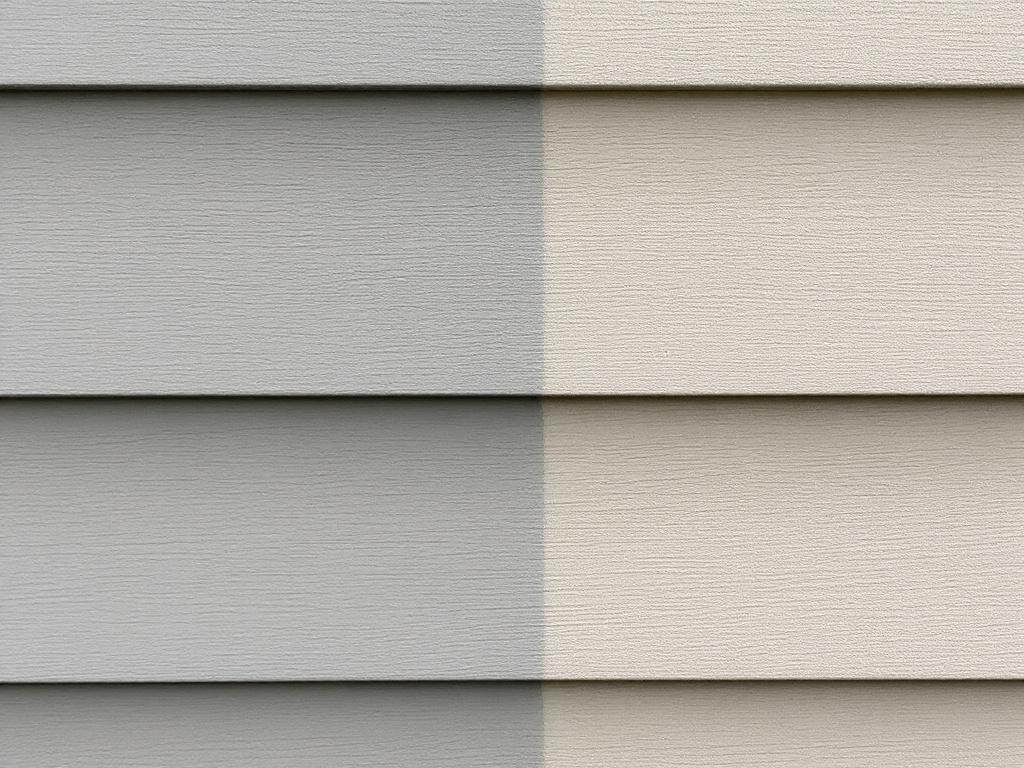
Visual Signs Your Paint Is Failing
Chalking: Rub your hand across the siding. If a powdery residue transfers to your hand, the paint binder is breaking down. Light chalking is normal; heavy chalking means repainting is needed soon.
Peeling or flaking: Paint lifting away from the fiber cement surface is a clear sign of adhesion failure. This exposes the raw board to moisture and must be addressed promptly.
Fading and color inconsistency: Noticeable color differences between walls (especially south-facing vs. north-facing) indicate UV degradation is taking its toll.
Bare spots or exposed cement: Any area where raw gray fiber cement is visible needs immediate attention before moisture damage occurs.
Repainting Cost Expectations
Professional repainting of fiber cement siding on a typical 2,000 sq ft Clark County home costs $5,000-$10,000 depending on preparation needed, number of stories, and paint quality. Use 100% acrylic latex paint rated for exterior use. Sherwin-Williams Duration or Benjamin Moore Regal Select are excellent choices for fiber cement. Proper preparation including washing, scraping, priming bare spots, and caulking is essential for the new paint to adhere and perform well. Skipping prep work is the most common reason repainting jobs fail prematurely. For professional help, explore our siding material options.
Common Fiber Cement Siding Problems and How to Prevent Them
Even the most durable siding material can develop issues, especially in our demanding Pacific Northwest climate. Understanding common fiber cement siding problems helps you catch them early and take preventive action. As noted by Today's Homeowner, most fiber cement problems stem from installation issues or deferred maintenance rather than material failure.
Cracking and Chipping
Fiber cement is rigid and can crack if impacted by hail, flying debris, or lawn equipment. Hairline cracks can also develop from improper nailing during installation, specifically nails driven too tight that don't allow for thermal expansion. Small chips along board edges are usually cosmetic.
Prevention: Keep landscaping equipment away from siding. Inspect after storms. For small chips, touch up with matching exterior paint. Cracked boards should be replaced rather than patched, as cracks allow moisture intrusion into the wall cavity.
Moisture Behind Siding
This is the most serious issue and often the hardest to detect. Water entering behind siding through failed caulk joints, improperly flashed windows, or inadequate house wrap can cause sheathing rot, mold growth, and structural damage. Signs include soft or spongy areas near the base of walls, musty odors inside, and staining on interior walls.
Prevention: Maintain caulk joints annually. Ensure all flashing is intact. Check that the gap between siding and ground is at least 6 inches. If you suspect hidden moisture damage, call a professional for an inspection immediately. Our siding repair team can diagnose and address moisture intrusion before it becomes a major structural problem.
Mold, Mildew, and Algae Growth
While fiber cement itself doesn't support mold growth the way wood does, organic matter that accumulates on the surface, such as dirt, pollen, and tree sap, creates a food source for mold and algae. Shaded walls and areas near sprinklers are especially prone. Green or black discoloration is the most visible sign.
Prevention: Annual cleaning as described in the section above is your best defense. Trim back vegetation that keeps siding in constant shade. Redirect sprinklers away from siding surfaces. Address drainage issues that keep the base of walls perpetually damp. For our full siding cleaning services, we use contractor-grade solutions that remove growth without damaging the finish.
Fastener Pops and Nail Staining
Nails that weren't set properly during installation can work their way out over time due to thermal cycling and settling. Visible nail heads or rust staining from non-galvanized fasteners are signs of this issue.
Prevention: Proper installation using corrosion-resistant, ring-shank nails prevents most fastener problems. If you spot a popped nail, reset it or replace it with a slightly larger diameter galvanized nail, then touch up the paint. Rust stains from non-galvanized nails can often be removed with oxalic acid cleaner, but the offending nail should be replaced.
Professional Maintenance vs. DIY: What Clark County Homeowners Should Know
Most routine fiber cement siding maintenance is well within the ability of handy homeowners. However, some tasks require professional equipment, expertise, or simply the safety of working with a team. Knowing where the line falls helps you budget appropriately and avoid costly mistakes.
Safe for DIY
- ✓
Ground-level cleaning: Washing siding you can reach from the ground with a hose and brush is straightforward and safe.
- ✓
Caulk inspection: Walking around your home and visually checking caulk joints takes 30 minutes and requires no special tools.
- ✓
Minor caulk touch-ups: Recaulking small sections at ground level with a quality sealant is a beginner-friendly repair.
- ✓
Paint touch-ups: Small areas of damaged paint can be sanded, primed, and touched up with matching paint.
- ✓
Vegetation management: Trimming bushes and trees away from your siding prevents moisture and debris problems.
Call a Professional
- →
Multi-story cleaning: Working on ladders above ground level carries significant fall risk. Professional crews have scaffolding and safety equipment.
- →
Board replacement: Removing and replacing cracked fiber cement boards requires specialized tools, proper cutting technique, and silica dust protection.
- →
Full repainting: Professional painters have the equipment, experience, and insurance to handle whole-house repainting safely and efficiently.
- →
Moisture investigation: If you suspect water damage behind the siding, a professional inspection with moisture meters can identify the source without unnecessary demolition.
- →
Flashing repairs: Window, door, and roofline flashing issues require expertise to fix properly and prevent recurring leaks.
Annual Fiber Cement Siding Maintenance Checklist
Spring (Primary Maintenance)
- ☐ Wash all siding surfaces (hose + brush)
- ☐ Inspect caulk at windows, doors, corners
- ☐ Check paint condition on all walls
- ☐ Look for cracked or damaged boards
- ☐ Clear vegetation from siding (6" gap minimum)
- ☐ Check ground-level moisture/drainage
Fall (Quick Inspection)
- ☐ Spot-clean mildew on shaded walls
- ☐ Recaulk any failed joints before rainy season
- ☐ Touch up paint on exposed/damaged spots
- ☐ Check gutters and downspouts near siding
- ☐ Ensure sprinklers don't hit siding
- ☐ Trim overhanging branches
Whether you handle maintenance yourself or hire a professional, the key is consistency. An hour or two of attention in spring and fall is all it takes to keep your fiber cement siding performing at its best for decades. If you'd prefer to leave it to the experts, contact Gold Shield Roofing And Gutters for professional maintenance, inspection, or repair services throughout Clark County.
Frequently Asked Questions About Fiber Cement Siding Maintenance
Common questions about caring for James Hardie and other fiber cement siding products
Keep Your Fiber Cement Siding Looking Like New
From annual cleaning to board replacement, Gold Shield Roofing And Gutters handles all your fiber cement siding maintenance needs in Clark County. Call today for honest advice and fair pricing.